

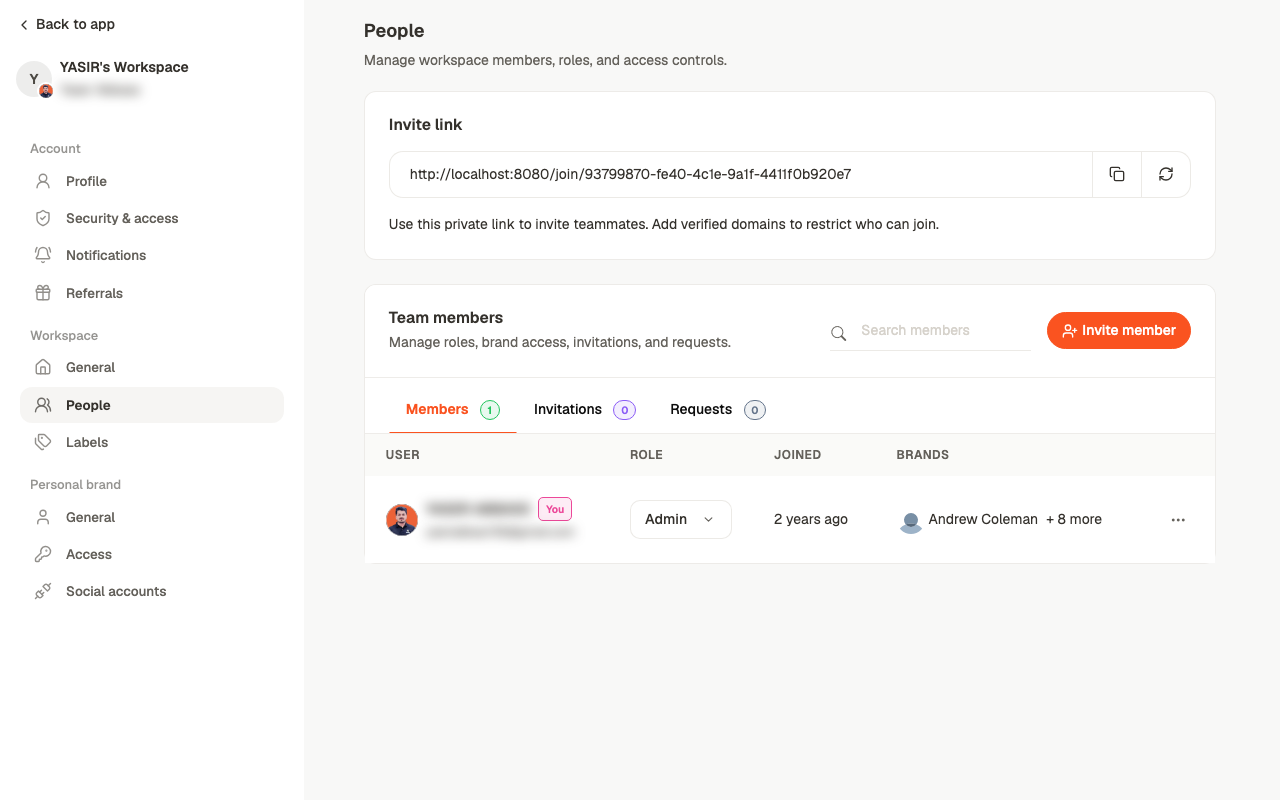
Two ways to add someone
Invite member
Invite by email address. They get a link and appear under Invitations until they
accept.
Invite link
A private link anyone can use to join. Copy it, or regenerate it to invalidate the old
one.
The three tabs
- Members — everyone who’s in, with their role and brand access
- Invitations — sent, not yet accepted
- Requests — people asking to join, waiting on approval
Roles
Each member has a role, changed from the dropdown in the table:Brand access
The Brands column shows which brands each member can work on. This is separate from their role: an Editor can be an Editor on one brand and have no access to another. That separation is what makes multi-client work practical — a freelancer can be given one brand without seeing the rest.Related
Workspaces and brands
Why the two layers are separate.
Settings
Where everything else lives.
Review and approval
What a reviewer does once they’re in.